Change vRealize Suite Lifecycle Manager 8 Datacenter location
Recently version 8.0 of vRealize Suite Lifecycle Manager was released (release notes and what’s new blog). Different from previous versions, this version now comes with an installer you can launch directly from your desktop and which can be combined with the installation of Identity Manager (either install or integrate with existing) and the deployment of vRealize Automation 8.
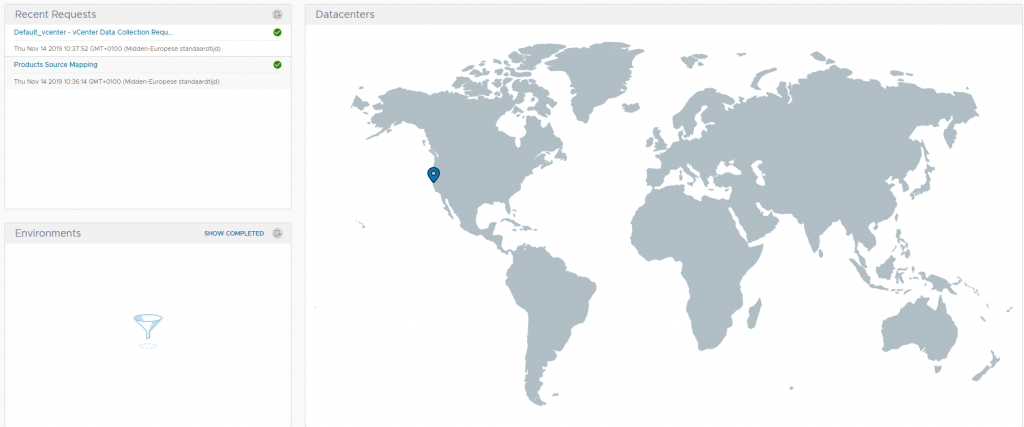
When deploying the latest version of vRealize Suite Lifecycle manager, the UI installer will directly create an environment for you (pointing to the vCenter server you have chosen as a deployment target). Even though this is nice functionality, it comes with a downside. A datacenter is also automatically created for your environment and the location of the default datacenter is set to VMware HQ’s location: Palo Alto.
Off course this is only a visual representation of my datacenter, it still annoys me that it is not set to my hometown. I want the location to be my hometown 🙂 . From the GUI there is no such option to reset the DC’s location.
I was playing with the Swagger UI earlier (available via https://<vRealizeLifeCycleManager-IPAddress>/api ) and figured I would first try and get my DC info using the “Try It” method.
Once logged in, scroll down to data-center-controller and click the GET button for “getAllDataCenters”

Next, click the “try it out” button followed by Execute
If all goes well, you should receive a Code 200 stating that the response is OK and your Datacenter details should be in the body:
[
   {
    "dataCenterName":"Default_datacenter",
    "multiSite":false,
    "primaryLocation":"Palo Alto;California;US;37.44188;-122.14302"
   }
]
As you can see, Lifecycle Manager tells you here that your DC location is in Palo Alto, California. We want to adjust this and as an example I googled the Latitude and Longitude (Lat 52.4939, Long 4.5938) of our ITQ office in Wijk aan Zee, The Netherlands to use as a location.
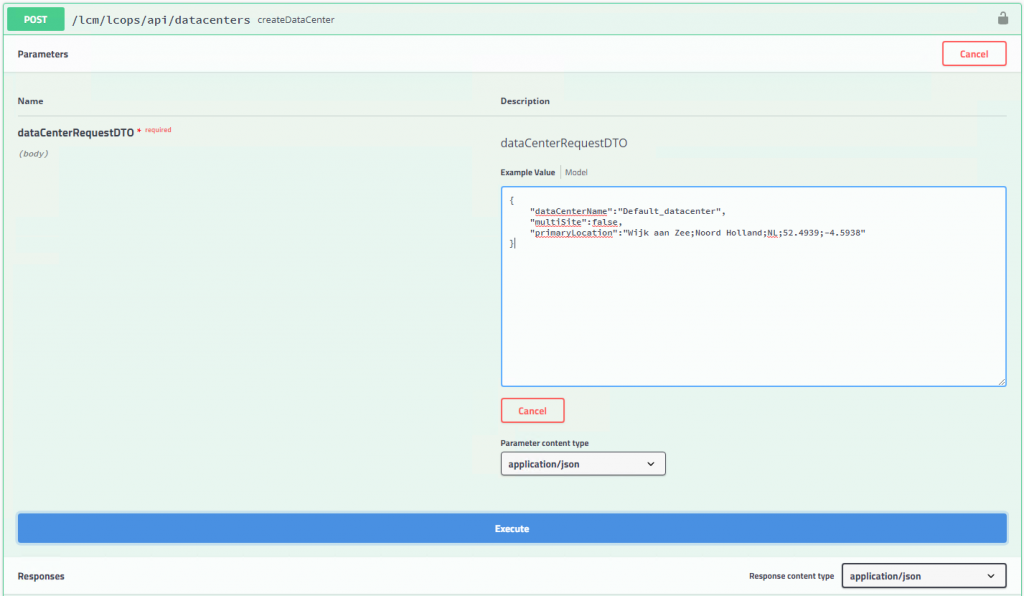
Next step is to modify the body we retrieved earlier and post it using the correct coordinates:
   {
    "dataCenterName":"Default_datacenter",
    "multiSite":false,
    "primaryLocation":"Wijk aan Zee;Noord Holland;NL;52.4939;-4.5938"
   }
In the Swagger UI, now look for the POST function for createDataCenter and click the POST button

Click the try it out button and paste the modified body (note that the square brackets have been removed!!) in the example value field:
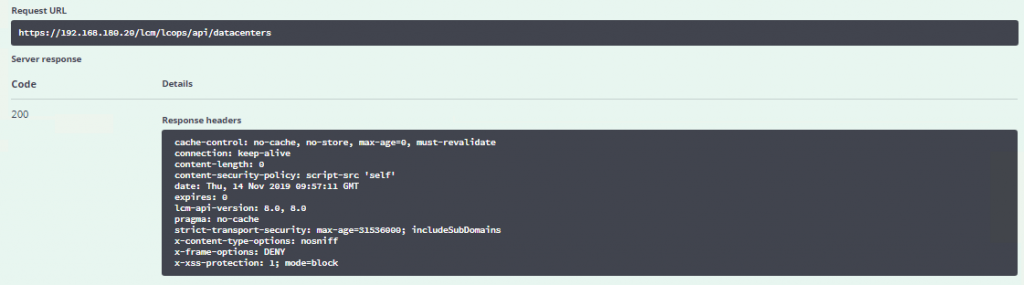
Click Execute to proceed. A status 200 OK should be returned by the server:
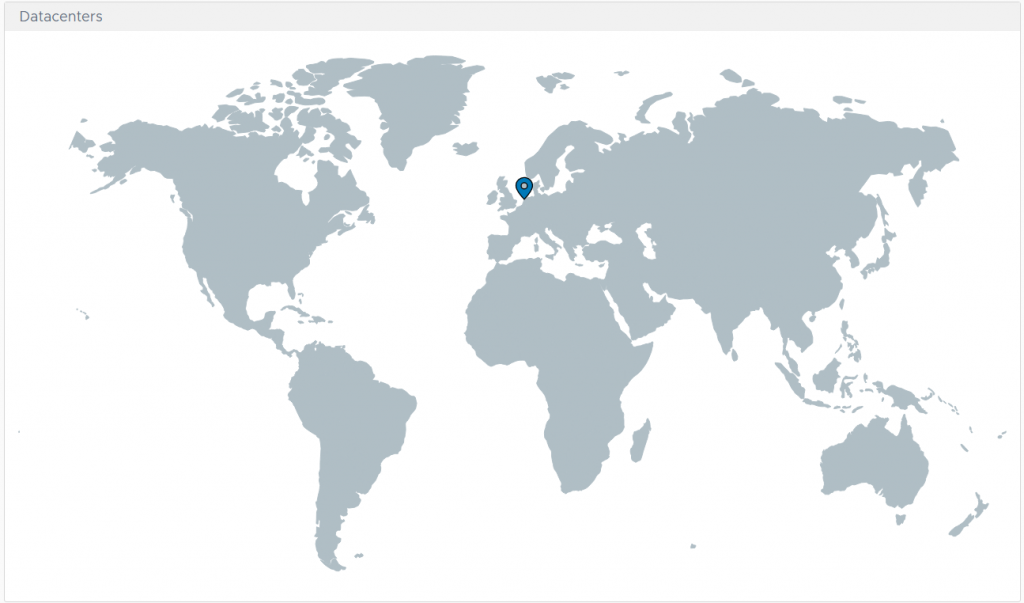
There, that’s it. The default Datacenter location has now been modified and if you go back to the Lifecycle Manager UI, the new location will be represented:
I am unsure if this method will be supported by VMware so use it with caution (maybe just in your homelabs). As far as I could see, no additional stuff is added or removed by running this and it’s just the modification of the location of the default Datacenter.